How to render beeswax: double boiler, solar melter, filtering, and casting clean blocks
Clean beeswax from cappings or old comb using a double boiler or solar melter. Step-by-step rendering, filtering, and mold-casting guide with fire safety rules.
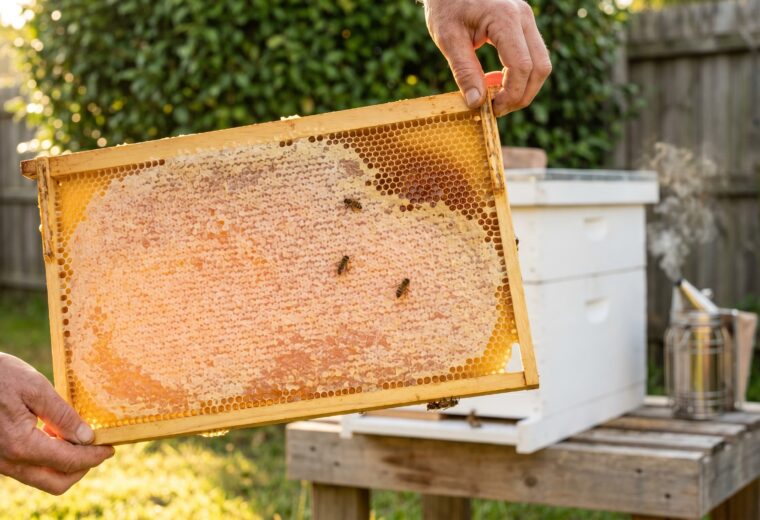
Pull your cappings bucket out of the extraction room and take a look at what you have. Pale, waxy, still fragrant - that pile is raw beeswax that will clean up into blocks useful for candles, lip balm, food wraps, and a dozen other projects. The process, called rendering, is mostly about heat control and patience: melt the wax gently, filter out the debris, and pour it into a mold before it cools. Two rules govern the whole job. Use indirect heat only. And never walk away from a hot pot.
What you are starting with: cappings vs. old comb
The source material shapes everything that follows. UF/IFAS Extension's publication on solar beeswax rendering puts it plainly: "The cleanest beeswax is usually rendered from honey cappings, which tend to be the newest comb in the hive. Wax from other comb tends to be older and is often darker due to the accumulation of debris."
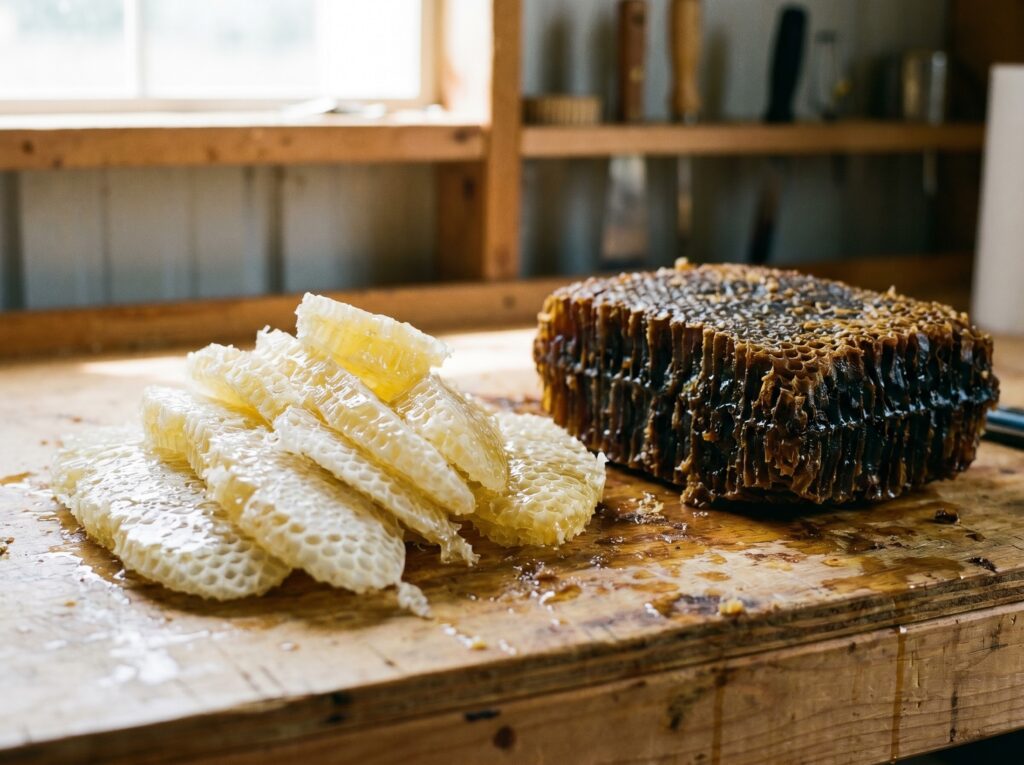
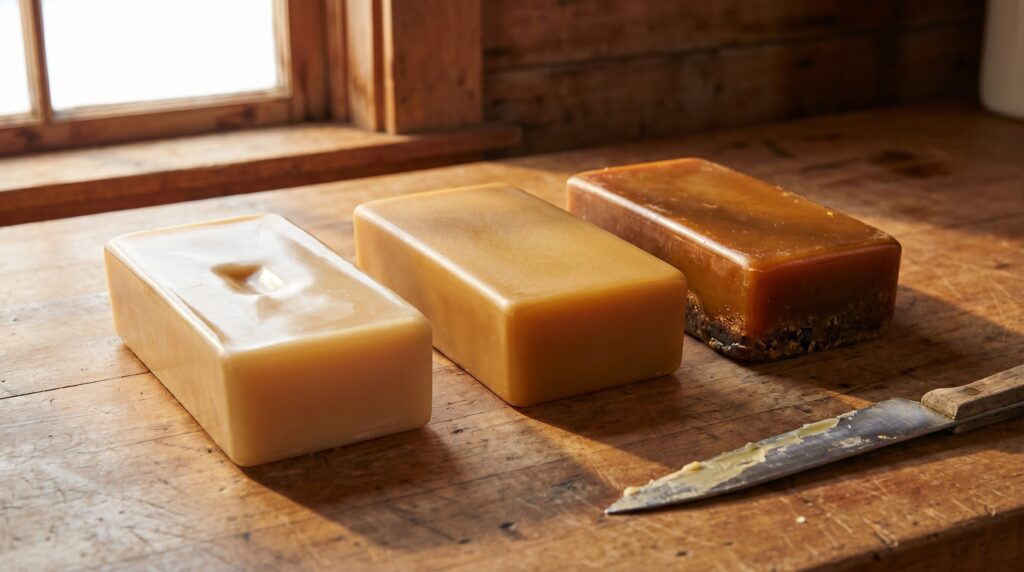
Cappings - the thin wax layer sliced off frames before extraction - are essentially virgin wax. They carry little propolis or cocoon residue, and they render into pale yellow to cream-colored blocks with a single pass. Old brood comb is a different situation. Each generation of larvae leaves behind a silk-like cocoon lining, and frames that have hosted several years of bees turn dark amber to nearly black. The wax is still fully usable; it just needs more filtering and will stay darker even after several cleaning passes. A beekeeper who separates the two streams - cappings wax for cosmetics, darker comb wax for candle making or foundation exchange - gets the most out of each type. The honey harvest guide covers when frames come off and which ones generate cappings vs. comb for retirement.
Before rendering either type, drain thoroughly and rinse. The University of Georgia Bee Program specifies letting cappings drip dry first, then washing them in water to remove all residual honey. Honey left behind when the wax melts will caramelize under heat, darken the batch, and thicken the slum gum layer you will need to scrape off later.
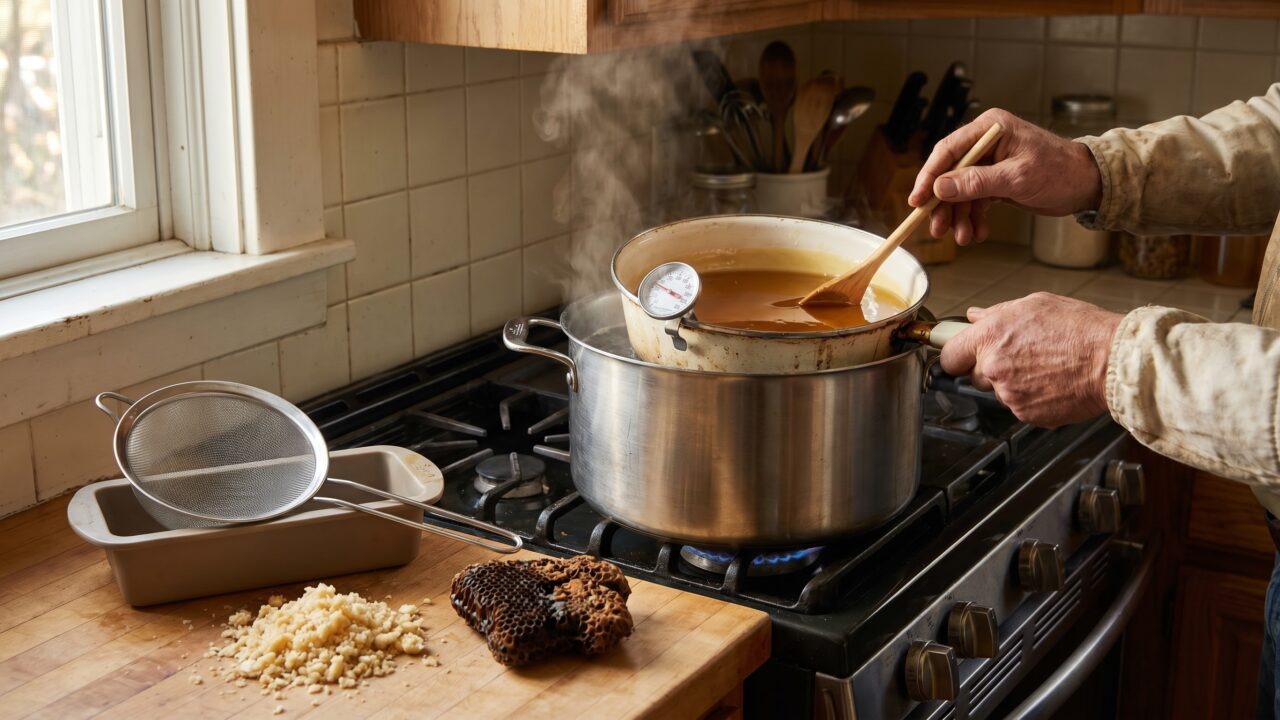
Double boiler: heat control you can count on year-round
A double boiler is two vessels - an outer pot of water and an inner container holding the wax. The water does the work of regulating temperature: it cannot exceed 212°F at sea level regardless of how high you set the burner, so the wax in the inner pot stays within a safe working window well below the temperature where quality degrades.
That boundary matters more than it might seem. Beeswax melts between 144 and 147°F (62-64°C). Above about 185°F, discoloration begins. The water bath gives you a 25-65°F cushion above the melt point before color suffers, and the fire risk from a properly set up double boiler is minimal. Direct heat sources - including a microwave - bypass this cushion entirely: a microwave heats wax unevenly and can cause localized overheating, pressure buildup, and violent spattering of hot liquid wax. The double boiler eliminates that scenario structurally.
For equipment, any large stockpot holds the water; any smaller stainless pot or dedicated coffee can sits inside it. Keep the inner vessel wax-only - beeswax bonds permanently to cookware and is essentially impossible to fully clean out. A clip-on cooking thermometer in the inner pot is worth using; aim for 150-165°F and do not push past 175°F.
The sequence:
- Drain and rinse cappings in cold water. Break large comb pieces into rough chunks so they melt evenly.
- Fill the outer pot with several inches of water and bring to a gentle simmer, not a rolling boil.
- Add rinsed wax to the inner pot. Do not stir once melting begins. Mann Lake's candle guide specifies avoiding stirring so that any foreign material settles to the bottom rather than staying suspended.
- When the wax is fully liquid and clear, pour it slowly through your filter (see filtering section) into the mold. Stop pouring when the darker debris layer at the bottom of the pot begins to move toward the spout.
- Turn off the heat before leaving the room. Beeswax is flammable; keep the water in the outer pot topped up so the inner vessel never contacts the burner directly.
Mann Lake's guidance for a second cleaning pass: "You can opt to do additional cleanings using a double boiler." For dark comb wax, two or three remelt cycles progressively clean the block without any extra equipment.
Solar wax melter: passive processing in summer sun

A solar melter does the same job without a stove, without fuel, and without close supervision. According to UF/IFAS Extension's rendering guide, the design is straightforward: pieces of wax and old comb go onto a slanted metal tray inside an insulated box covered with a glass lid oriented toward the sun, with the interior painted black to absorb radiation. Heat builds inside, wax melts off the tray, and it drips into a collection pan. When the pan cools, it pops out as a rough block with debris settled on the underside.
On a warm sunny day, temperatures inside a well-built solar melter typically reach 150-170°F - well above the 144-147°F melt point of beeswax - though the exact temperature depends on ambient heat, glass area, sun angle, and box construction. That means no stove time and no watched pot, which suits high-volume cappings processing during peak harvest season. The output is coarser than a filtered double-boiler run, but most beekeepers use the solar melter as a first pass to separate wax from the bulk of the debris, then do one double-boiler filtering pass to finish the block.
One detail UF/IFAS emphasizes that is easy to overlook: "The melter should always be bee tight; honey bees are usually attracted to the odor of melting wax." A poorly sealed box draws robbing bees to hot wax, which is both a mess and a hazard to the colony.
Commercial solar melters from Mann Lake, Betterbee, and Dadant run roughly $80-$180 depending on size. A functional DIY version needs a lidded wooden box, a sheet of glass or clear polycarbonate, a dark-painted metal tray, and a collection pan - materials that cost $25-$40 from a home improvement store.
Choosing between the two methods
Neither method is strictly better. Each fits different conditions. This comparison covers the practical variables that determine which one to use.
| Factor | Double boiler | Solar melter |
|---|---|---|
| Equipment cost | $0-$30 (dedicated pots you already own) | $80-$180 commercial; $25-$40 DIY |
| Temperature control | Precise - capped at 212°F by water bath | Passive - varies with sun intensity and ambient temp |
| Attention required | Active - must stay present | Passive - load and check periodically |
| Season | Year-round, indoors | Warm sunny days only |
| Output quality, single pass | High when filtered through nylon or felt | Moderate - gravity separation removes bulk debris |
| Best for | Year-round use; cosmetics-grade wax; second-pass cleaning | Summer bulk processing; old comb; low-effort first pass |
| Fire risk | Very low (water limits temp) | Essentially none (no flame) |
Filtering: removing slum gum from the melt
Hot liquid wax straight from the pot carries slum gum in suspension - a mix of cocoon silk, bee body fragments, pollen, and propolis. Mann Lake describes it as "debris or impurities, commonly called slum gum," that appear in any first rendering. Filtering while the wax is still hot removes most of this before the block hardens.
Filter material options, from coarsest to finest:
- Cheesecloth: removes large particles but passes fine debris. Useful as a first pass to keep finer filters from clogging.
- Nylon stocking or mesh bag: finer than cheesecloth and reusable. The University of Georgia Bee Program recommends nylon specifically for straining cappings wax into molds.
- Maple syrup felt filter: the standard for cleaner wax. Catches material that doubled muslin misses.
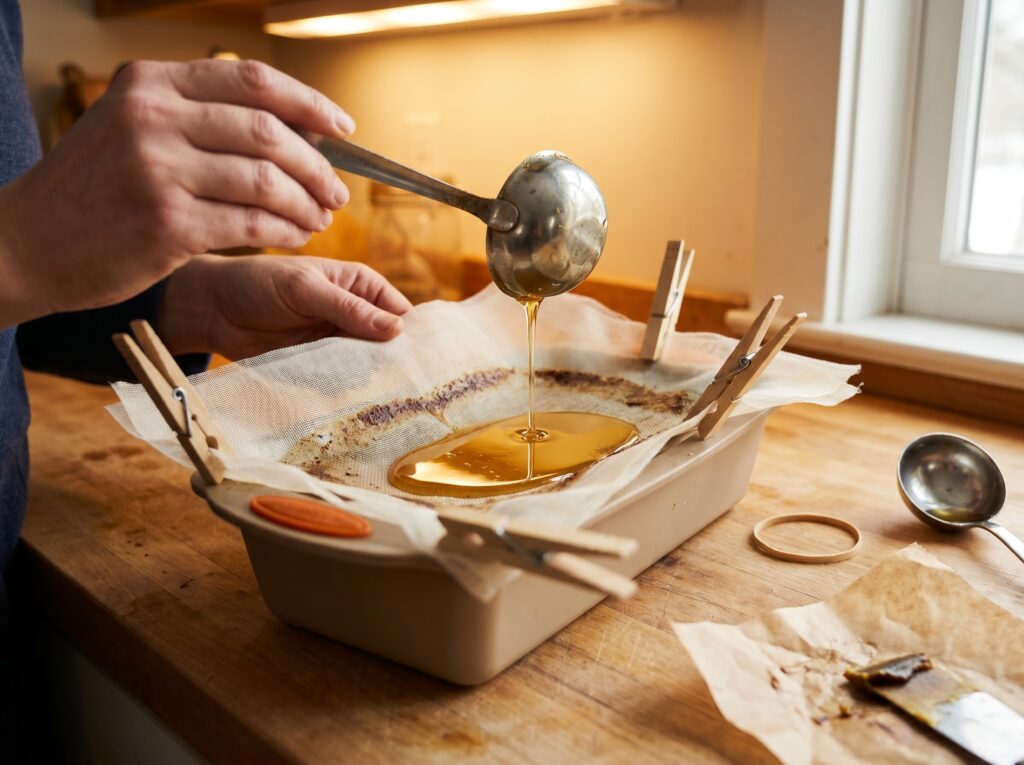
- Paper towels (doubled): slow flow but removes fine particulate; practical for small batches where a clogged filter can be quickly replaced.
A two-step approach that consistently produces clean results: pour the full hot batch through doubled nylon or cheesecloth into a holding pot to capture bulk debris. Then do a second pour through a felt filter or doubled paper towels into the final mold. Secure filter material over the mold opening with rubber bands or clothespins. Keep the wax warm throughout - wax that cools mid-pour thickens and clogs the filter within minutes.
The settling method works without filter materials. UF/IFAS Extension describes it: keep liquid wax warm so foreign materials settle to the bottom, then once the cake hardens, scrape the detritus off the underside. The cleaning process can be repeated as many times as needed. For large batches where cheesecloth would require constant replacement, this method - melt, pour into a container, let cool, scrape - is efficient and material-free.
Once you have clean filtered blocks, the wax is ready for any project. You will find step-by-step instructions in the beeswax candles guide and in the beeswax wraps guide, which each cover their specific melting and application temperatures.
Molds, cooling, and storing the finished block
Silicone loaf pans are the easiest mold choice - finished blocks release clean without prying. Standard bread pans work too; a light coat of cooking spray or vegetable oil on the interior lets the block pop out once cooled. Muffin tins produce small rounds that are easy to handle and weigh. Whatever the mold, overfill slightly since beeswax contracts as it cools.
Cool at room temperature without rushing it. Sudden cold - a refrigerator, cold water bath, or a stone counter - causes the outside to harden faster than the interior and the stress cracks the block. Set the mold on a folded towel or a wooden board and leave it undisturbed. A one-pound block takes three to five hours to fully set; a larger pour needs overnight. Beeswax contracts as it cools and solidifies, so a shallow dimple on the top surface of the finished block is normal and not a sign of a problem.
Once solid, inspect the bottom of each block. Any gray-brown gummy layer there is settled slum gum - slice it off with a knife and either discard it or add it to your next melting session for another pass. The clean block stores wrapped in parchment or in a sealed container. Beeswax is shelf-stable for years, but open blocks sitting in sunlight will bleach to a lighter, less attractive color over time.
A practical yield expectation: plan for roughly one pound of clean rendered wax from every ten pounds of raw cappings. That ratio accounts for honey drainage, wash water, slum gum loss, and filter waste. Old brood comb runs lower - sometimes as little as half that - because of the heavier cocoon residue. Knowing your expected yield helps you decide whether to batch small runs together before firing up the double boiler.
Label each batch by source (cappings vs. old comb) and harvest year if you intend to use the wax for anything appearance-sensitive. Pale cappings wax and well-filtered medium-amber comb wax behave similarly in most projects, but knowing what you have saves time later.
Fire safety while rendering
Beeswax is flammable. The melting point sits around 144-147°F; the flash point is much higher - near 400°F in most reported references - which is why a correctly set up double boiler presents essentially no ignition risk. The water bath cannot exceed 212°F. Keep the water level in the outer pot topped up throughout, because if it boils dry and the inner wax container contacts the burner directly, temperatures can climb toward dangerous territory faster than you expect.
Per Mann Lake's beeswax processing guidance: "beeswax is flammable. Stay in the kitchen during the cleanings and inspect your wax for smoke or burning." Smoke, not flames, is the warning sign. If the wax begins to smoke, pull the inner pot off the heat immediately. Smoke means you are approaching discoloration territory and, further still, potential ignition.
Practical fire-safety points to keep posted near your rendering setup:
- Use a double boiler or solar melter - never a single pot over direct heat, and never a microwave.
- Keep a tight-fitting metal lid within reach to smother any surface fire. Do not use water on burning wax: water causes a violent steam explosion that spreads burning wax over a wide area.
- A dry chemical (Class B/C) fire extinguisher is the correct response to a wax fire. If you regularly work with melted wax, having one in the same room is worthwhile.
- Keep flammable materials - paper towels, cardboard, wooden utensils - well away from the heat source.
These same rules apply when you remelt rendered blocks for candle making, cosmetics, or any other project. A finished block and a raw cappings batch have the same flammability. Treating every wax session with the same habits is what prevents incidents.
Questions answered
Can I render beeswax in a slow cooker instead of a double boiler?
A slow cooker on its lowest "warm" setting can work, but the temperature varies widely by brand - some models run hot enough on "low" to approach 190°F, which edges toward discoloration territory. A cooking thermometer is essential if you go this route. The double boiler is more reliable precisely because the water bath provides an automatic upper limit, making it difficult to accidentally overheat the wax regardless of burner setting.
Why is my finished wax block cracked?
Cracking happens when the outside of the block hardens before the interior, creating internal stress as the wax contracts. The fix is slower cooling - set the mold on a folded towel on a wooden surface, away from cold stone counters, and do not refrigerate. For very large pours, wrap the mold sides loosely in a towel during the first hour of cooling to slow heat loss from the edges.
How dark is too dark for finished beeswax?
There is no definitive threshold - it depends on intended use. Very dark wax (near brown-black) from old brood comb often carries a stronger smell and may not be right for cosmetics or food wraps where odor or color matters. For candle wax, natural beeswax coloring in any shade is acceptable. If a block smells of mold or fermentation rather than honey and wax, discard it rather than incorporating it into a project.
What do I do with the slum gum scraped off the block?
Most beekeepers compost it or discard it. Slum gum has very little recoverable wax - mostly cocoon silk, propolis, and pollen - and the effort to extract more wax from it rarely repays itself at home scale. Some beekeepers add it to smoker fuel, where it burns slowly and produces cool, dense smoke.
- University of Florida IFAS Extension (EDIS), "Solar Beeswax Rendering and Hints for Exhibiting Wax Blocks" (ENY111/AA157)used for solar melter design (slanted tray, black interior, glass top), bee-tight construction requirement, and settling purification method
- University of Georgia Bee Program (CAES), Processing Honey pageused for cappings washing step and nylon-filter molding guidance
- Mann Lake Bee & Ag Supply, beeswax separation and candle-making guidesused for melting point (144-147°F), 185°F discoloration threshold, flammability/stay-in-kitchen warning, no-stir settling method, and slum gum definition
- PMC / MDPI, "Effect of Storage Time and Floral Origin on the Physicochemical Properties of Beeswax" (PMC9736214)used for thermal behavior above 95-105°C (foam formation) and 140°C (volatile fraction evaporation)
- Betterbee, solar wax melter guide and crockpot processing guideused for typical solar melter interior temperature range (150-170°F on warm sunny days) and microwave avoidance guidance
- Ask Extension (extension.org), expert response on wax renderingused for two-stage felt and paper-towel filtering method