How to inspect a beehive: a calm, ordered routine for reading your colony
A calm hive inspection routine: what to look for and in what order, how often to open up, the checklist, and how to read what the colony is telling you.
A good hive inspection answers three questions in order: does the colony have a working queen, does it have enough food, and is anything attacking it. Work through those, in that sequence, and most of an inspection takes care of itself. The trap beginners fall into is opening the hive with no plan, pulling every frame, hunting for the queen, and stressing the colony for twenty minutes to learn less than a calm five-minute look would have told them. This guide gives you the routine: what to notice, in what order, how often to do it, and how to read the answers the bees hand you.
Decide why you are opening the hive before you light the smoker. The University of Tennessee's extension guidance is blunt about it: think about the purpose first so the hive stays open only a short time. A spring swarm check, a food check before a cold snap, and a post-treatment mite recount are three different visits with three different goals. Name yours, and you will pull the two or three frames that answer it instead of disturbing all of them.
The order to read a hive, every time
Run the same sequence each visit and it becomes muscle memory. The point is not to see everything; it is to confirm the colony is queen-right, fed, and clean, then close up. Here is the order, from the moment you walk up to the moment you put the lid back.
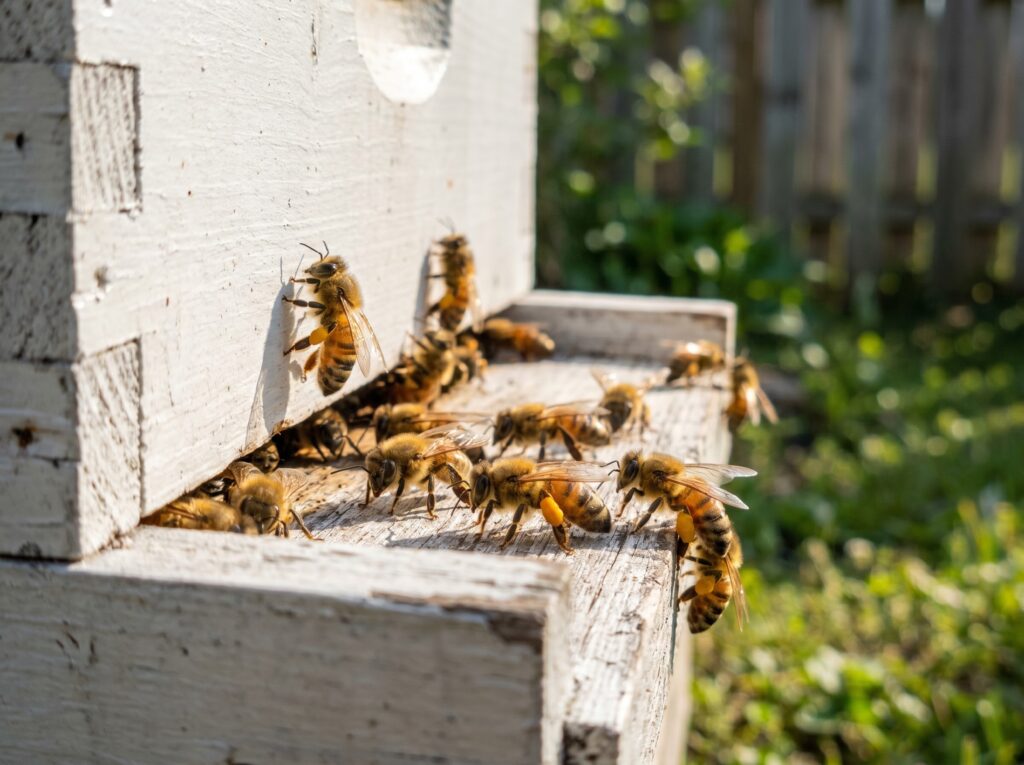
- Before you open it. Watch the entrance for a minute. Steady traffic, bees hauling in fat balls of pollen on their legs, and guards behaving normally all say a lot before a single frame moves. A quiet entrance on a warm flying day, or a pile of dead bees out front, is a flag to read carefully inside.
- Crack the lid and read the top. Note whether bees are boiling up between the top bars (crowded, maybe needs space) or barely covering the frames (small or struggling). Glance at the inner cover for moisture or pests.
- Go to the brood nest. This is where the answers live. Start with an outer frame to make room, set it aside, then work inward toward the brood. You do not need to see the queen if you find what she has been doing.
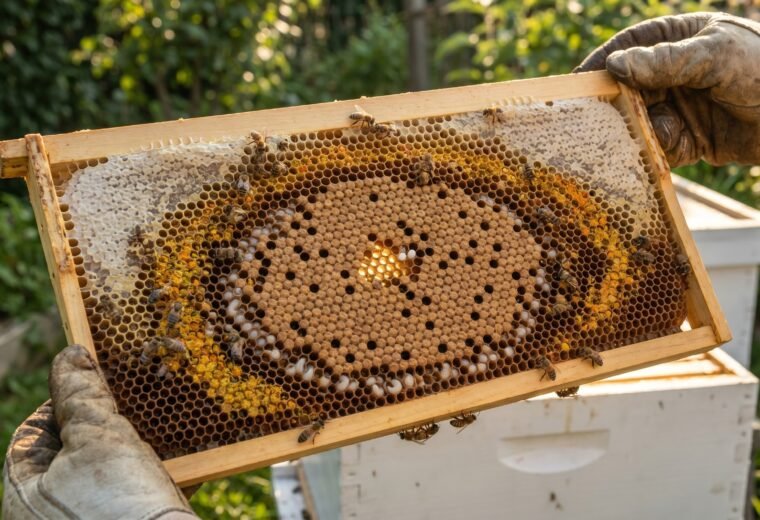
- Find eggs first. One egg standing on end in the bottom of a cell is the single most useful thing you can see. An upright egg means a queen laid there within about a day; it tilts over by day two and lies flat by day three, so any egg at all means she was laying within three days. Either way the queen-right question is answered without ever spotting her.
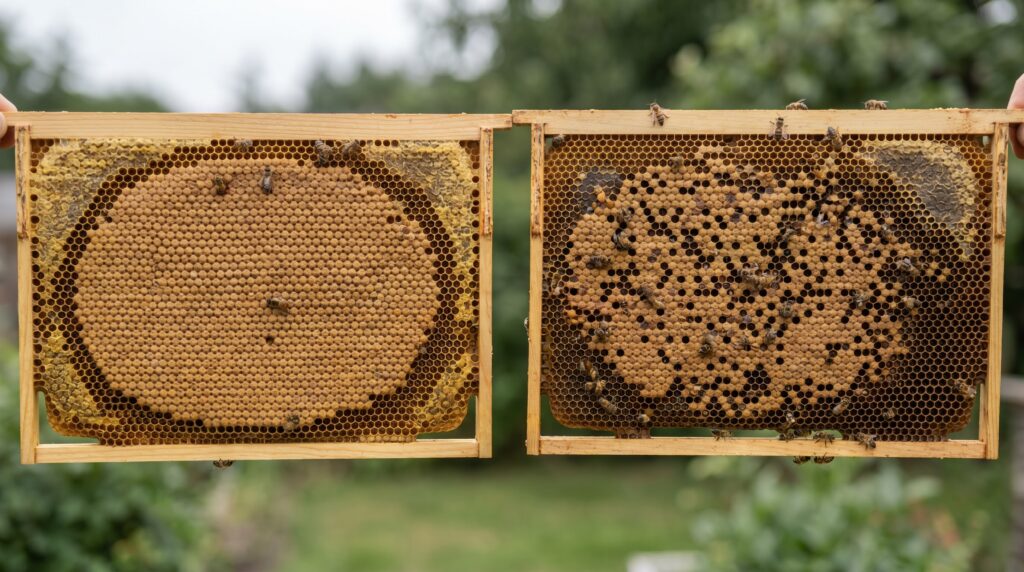
- Read the brood pattern. Look at the larvae and the capped brood. You want pearly-white larvae and a solid, oval slab of capped cells, not a scattered, gap-toothed sheet.
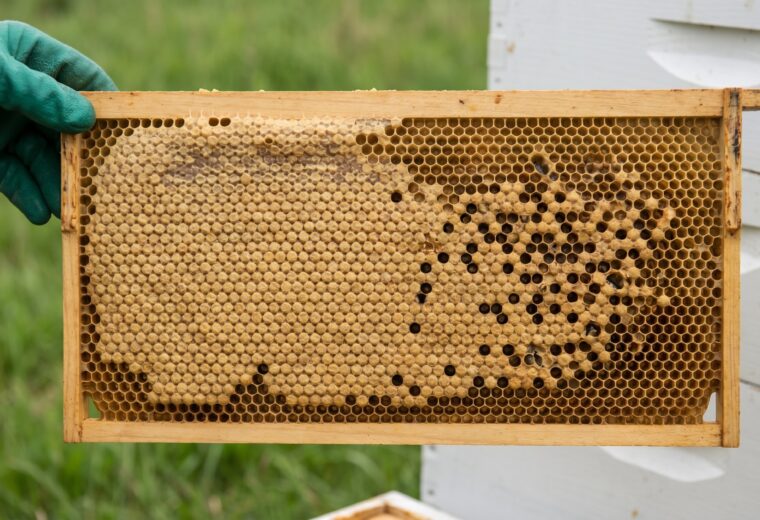
- Check the stores. Confirm a ring of pollen around the brood and capped honey toward the frame edges and outer frames.
- Scan for trouble. Look for small hive beetles scurrying when light hits, wax-moth webbing, chewed or perforated cappings, deformed wings, and a foul smell.
- Close gently and write it down. Replace frames in order, set the boxes square, and record what you saw before the details blur.
That sequence holds whether you have a struggling 3-frame nuc you are nursing along or two booming double-deeps in midsummer. The frames you pull scale with the colony; the order does not. The fastest way to learn each step is to take the frames one at a time, and there is a full walkthrough of holding and turning a frame in reading a brood frame.
How often to open the hive
About every 7 to 10 days through the active season is plenty for most backyard hives, and going more often usually costs you more than it gives. UF/IFAS extension guidance is to inspect most frequently in spring, when swarm pressure and growth are highest, and the same Florida 4-H apiary material suggests checking a new colony roughly every two weeks for its first months, then as needed. Each time you open up, you break the brood-nest's warm 95 F core and scatter the colony's scent organization; the bees spend the next day putting it back. Open it weekly and you are constantly resetting that clock.
Swarm season is the one window where weekly beats biweekly. A new queen develops in just 16 days, and Tennessee's extension points out that the early stages of a queen cell are hard to spot, so a 14-day gap can let the colony build queen cells and slip away between visits. During the spring swarm push, look every 7 days at the brood frames' bottom edges for queen cups and cells. Outside that window, stretch back out. The full frequency-by-season breakdown lives in how often to inspect a hive.
Weather sets the floor. Work on a calm, mild day when most foragers are out in the field, and keep visits brief: a still, sunny afternoon is the gentlest time to open up, while a cold, windy, or rainy day chills brood and packs every bee at home and irritable. The cold end matters most. For opening a hive in the cool months, Utah State extension advises waiting for a calm day above about 55 F, working quickly to limit heat loss, and otherwise leaving the cluster alone. The colder it is, the shorter and rarer your visits should be.
The inspection checklist
This is the routine in a form you can carry to the hive, grouped by the three areas a basic inspection covers. Run it top to bottom, mark what you see, and you will rarely forget the step that mattered. Adapt the targets to your goal for the visit.
| Area | What to confirm | Good sign | Flag to act on |
|---|---|---|---|
| Queen / population | Eggs present (one per cell) | Single eggs standing in cells; calm bees | No eggs at all; multiple eggs per cell on the walls |
| Queen / population | Brood pattern | Solid oval slab of capped brood | Spotty, scattered, sunken or perforated cappings |
| Queen / population | Larvae look healthy | Pearly-white, glistening, C-shaped | Yellow, brown, ropey, or sunken larvae |
| Queen / population | Adult bee strength | Bees cover most brood frames | Sparse bees; shrinking cluster week to week |
| Queen / population | Queen cells on frame edges | None (outside swarm season) | Capped cells hanging off the bottom bar |
| Food stores | Honey and nectar | Capped honey at frame edges and outer frames | Bare frames, no capped stores before winter |
| Food stores | Pollen | Ring of pollen around the brood | No pollen, or pollen packed into the brood nest |
| Food stores | Open laying space | Empty cells for the queen to lay | Honey-bound or pollen-bound brood nest |
| Disease / pests | Varroa load | Below threshold on your last wash | Mites on bees, deformed wings, overdue for a wash |
| Disease / pests | Beetles and moths | Few or none; no webbing | Beetles running from light; wax-moth tunnels |
| Disease / pests | Smell and cappings | Sweet wax-and-honey smell; tan, domed cappings | Foul or sour odor; sunken, greasy, holed cappings |
One column on that table does more work than the rest: eggs present. If you see fresh eggs, the queen question is settled and you can move faster through everything below it. If you do not, that becomes the visit's whole job, and the sister-article on telling whether a hive is queenless walks through confirming it before you spend money on a new queen.
How to read what the colony is telling you
The frames are a message; the skill is translating them. Most of an inspection comes down to four readings, and learning to take them in order keeps you from misdiagnosing.
Eggs answer the queen question. A single egg standing on end in the bottom of a cell means a queen laid there within about the last day. The egg tips over by day two and lies flat by day three as it ages toward hatching, so any visible egg at all means she was laying within three days. UF/IFAS extension puts it simply: one egg per cell is an easy way to know your queen is healthy and present. Find eggs and you almost never need to hunt the queen herself. When you do want to find her, her longer abdomen, shinier back, and the small circle of attendant workers around her are the giveaways, and there is a focused method in how to find the queen.
The brood pattern answers the laying-quality question, with one honest caveat. A healthy queen lays a tight, solid oval; UF/IFAS describes the good frame as a uniform oval pattern and the worrying one as spotty all over. But spotty does not automatically mean a bad queen. A 2019 study published in Insects found that queens pulled from poor-brood colonies started laying solid patterns once moved into healthy colonies, which means a gappy frame can come from sick brood, inbreeding, poor nutrition, or a chill, not just the queen. So read a spotty pattern as a question, not a verdict, and the diagnostic ladder for it sits in reading brood patterns.
Some frames are simply normal and beginners panic at them anyway: a frame of all drone brood at the edge in spring, a band of bright pollen, a few queen cups with nothing in them. Knowing which is which saves a lot of needless requeening, and the side-by-side comparison lives in normal versus problem frames.
The stores and the smell answer the survival questions. Brood sits at the warm center, pollen rings it, and honey caps the edges; when bees pack honey or pollen into the brood nest with nowhere left for the queen to lay, the colony is space-starved and headed for a swarm. And trust your nose. A healthy nest smells of warm wax and honey. A sharp or foul smell over sunken, greasy, perforated cappings is a reason to stop and call your local extension or bee inspector, because some brood diseases are reportable and not a DIY fix. When a colony dies despite looking fine on paper, the autopsy is its own skill, covered in why did my hive die.
Smoke, tools, and a calm hand
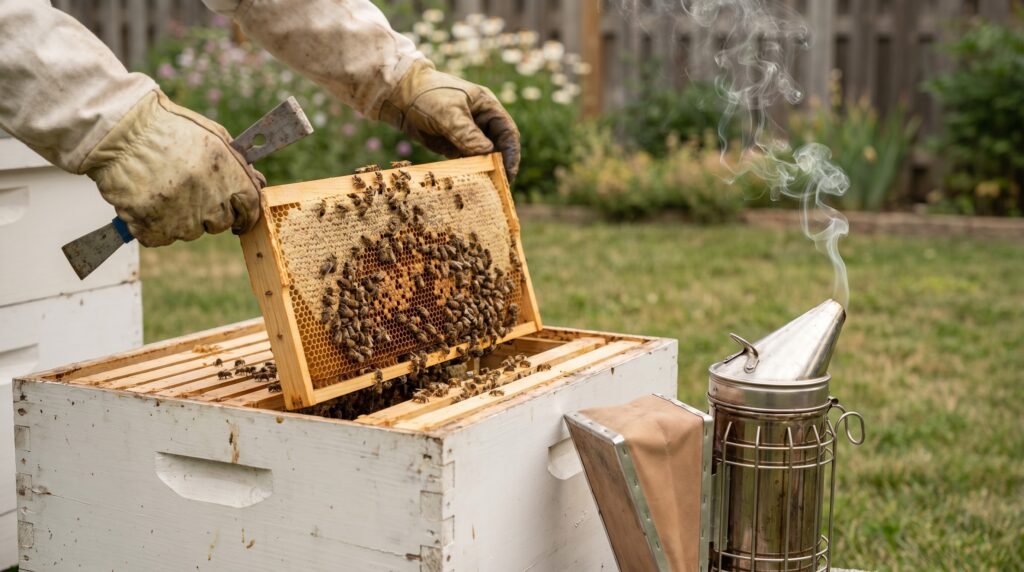
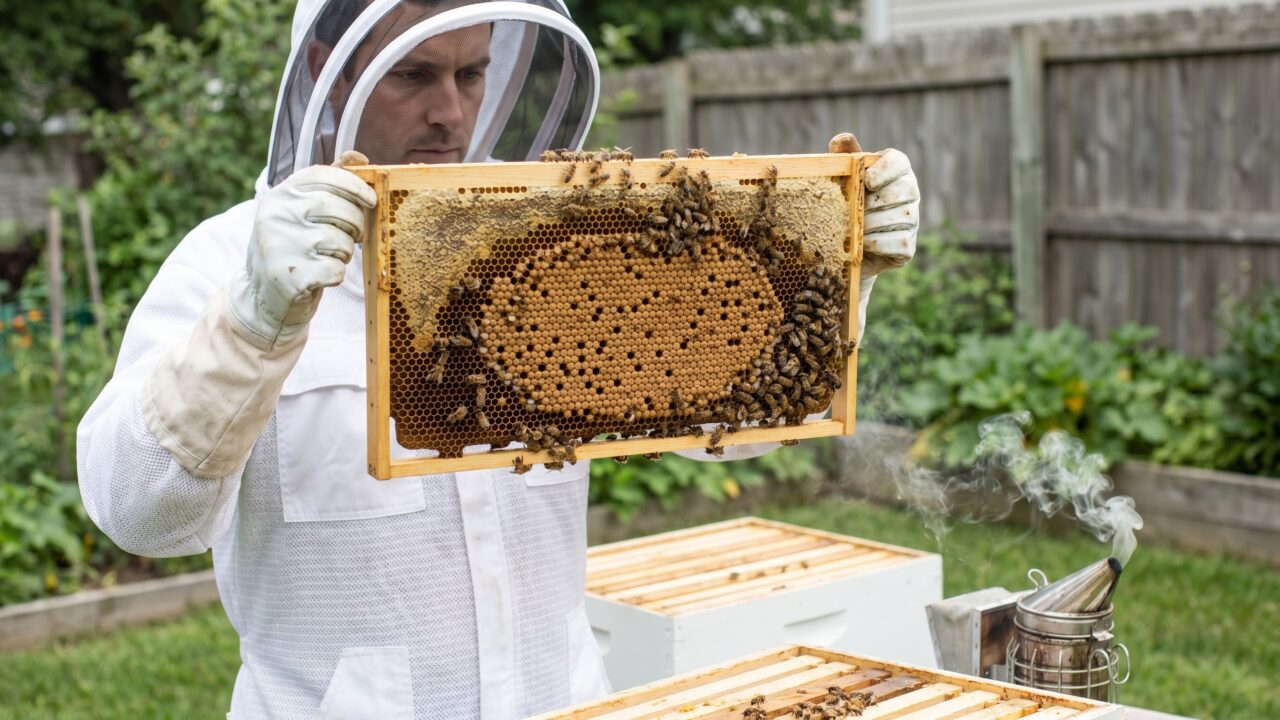
How you open the hive shapes what you see. Light the smoker first and get it producing cool, white smoke, not hot sparks. A few puffs at the entrance and a couple under the lid, then a pause of a minute or two, settles the colony before you lift a frame. Calm bees stay on the comb where you can read them; alarmed bees boil up and fly, and you lose the picture. A reliable smoker that stays lit through a full inspection is worth more than almost any other tool, and the picks are compared in the best bee smokers.
Move like you have all afternoon even when you do not. Pull the first outer frame straight up and set it leaning against the hive to make room, then slide the rest sideways one at a time so you never roll bees, or the queen, between two frames. Work over the open box so a dropped queen falls home. Keep visits short: the longer the brood nest sits open and cooling, the more the colony has to recover afterward.
Skip the visual mite check while you are in there, because it does not work. Tennessee's extension is direct that eyeballing mites on the backs of bees badly undercounts the real load, since varroa hide in capped brood and under the bee. The only honest read is a wash. Pull about 300 bees (a half cup) from a brood frame, do an alcohol wash or sugar roll, and count. The Honey Bee Health Coalition sets its action threshold at about 2 mites per 100 bees, and the make-or-break check falls in late summer, before the winter bees are reared. The full monitoring method and thresholds sit in how to test for varroa, and the sampling falls naturally at the end of your normal inspection.
Writing it down, and stings
Record the visit before the frames blur together. A simple sheet, eggs seen yes or no, brood pattern good or poor, stores, mite count, anything you need to do next, turns four scattered visits into a trend you can actually read. Tennessee's extension makes the case plainly: reading last time's notes before you go out tells you which tools and treatments to bring, and gives you a search image for the queen before you even open up. Paper or phone app, it matters less than the habit.
You will get stung doing this; that part is normal. A typical sting brings local pain, swelling, and redness that fade in a day or two. A severe, whole-body reaction is different and rare: trouble breathing, swelling of the tongue or throat, dizziness, or hives spreading well beyond the sting. The Cleveland Clinic is clear that those signs mean emergency care now, so call 911 or get to an emergency room and use a prescribed epinephrine auto-injector if you carry one. If you have a known venom allergy, talk to an allergist before you keep bees. This guide covers reading and managing the colony, not medical treatment.
Close on this: an inspection is a conversation, not a search. Look at the entrance, find eggs, read the brood, check the stores, scan for pests, write it down, and shut the lid. Do that calmly every 7 to 10 days in season and you will catch the problems while they are still small, which is the whole point of opening the hive at all.
Questions answered
What should I look for first when I open the hive?
Eggs. One egg standing on end in the bottom of a cell tells you a queen laid there within about a day, and any visible egg at all means she was laying within three days, which settles the most important question without hunting for her. After eggs, read the brood pattern and larvae, then check honey and pollen stores, then scan for pests. Working in that order keeps the visit short and focused.
Do I need to smoke the hive every time?
For a standard brood-nest inspection, yes, a little cool smoke is worth lighting every time, because it calms the guard response and keeps bees on the comb where you can read them. A few puffs at the entrance and under the lid, then a short wait, is usually enough. You can skip it for a ten-second peek under the lid or a quick syrup top-up, but if you are pulling frames, light the smoker first and keep it going.
How long should an inspection take?
For a routine check, aim for under 15 minutes once you have a system. The brood nest sits near 95 F, and every minute it is open and cooling is time the colony spends recovering instead of working. Decide your goal before you light the smoker, pull only the frames that answer it, and resist the urge to admire every comb.
Is a spotty brood pattern always a bad queen?
No. A solid oval is the healthy sign, but a 2019 study found gappy patterns often improved once the same queen moved to a healthy colony, meaning poor nutrition, chilled brood, disease, or inbreeding can cause it too. Treat a spotty frame as a reason to look closer at mites, food, and brood health, not as automatic proof you need a new queen.
- University of Tennessee (UTIA) Extension, "Honey Bee Inspections and Recordkeeping" (W 1151)used for the three inspection areas, queen-right via neatly laid eggs, swarm-season frequency, frame layout, and the record sheet
- UF/IFAS Extension, "Welcome to the Apiary! Honey Bee 4-H Project Book"used for one-egg-per-cell as a queen sign, the four brood stages, and uniform versus spotty brood patterns
- Lee et al., "Is the Brood Pattern a Reliable Indicator of Queen Quality?" (Insects, 2019)used for the finding that brood pattern alone does not prove queen quality
- Honey Bee Health Coalition, "Tools for Varroa Management"used for the 300-bee sample and the late-summer monitoring window before winter bees
- Cleveland Clinic, "Bee Sting"used for normal versus severe sting reactions and when to seek emergency care