How to requeen a hive: finding the old queen, introducing the new one, and checking that it worked
Step-by-step guide to requeening a hive: when to do it, locating and removing the old queen, safe candy-cage introduction, and how to confirm the new queen is laying.
Most backyard beekeepers wait until something goes wrong before they think about requeening. By then, the colony has already been running on a declining queen for weeks, sometimes months, and the population dip that follows a failed queen introduction can cost a hive its chance at a good winter. The better time to do this is planned, not reactive: once a year, timed to a window that sets the new queen up for success. Penn State Extension puts the productivity decline starting after the first or second year, and a queen laying at half capacity pulls the whole colony down with her over the following brood cycle.
Requeening itself is not complicated. But it has a sequence, and the order matters. Skip a step, or rush the timing, and introduction failure is likely. This article covers each stage in the order you actually do them: reading the signs that a requeen makes sense, locating and removing your current queen, choosing an introduction method, and checking that the new queen has been accepted.
When requeening actually makes sense
There are two situations: planned replacement and reactive replacement. Planned is generally the wiser of the two.
Annual requeening is the standard recommendation from UF/IFAS, and the logic is straightforward - a young queen produces more pheromones, which helps suppress swarming, and lays more consistently than an older one. The preferred window depends on region, but late summer through early September covers most of the US: queens are widely available, sometimes at lower prices than spring stock, and the new queen has time to lay a healthy cohort of winter bees before the cluster forms. A spring window also works, particularly if your goal is swarm prevention heading into the main season.
Reactive requeening is triggered by specific observations at the hive. Things worth acting on:
- Population dwindling with low mites, adequate stores, and no disease explanation
- Brood pattern that has shifted persistently spotty over two or three inspections - though research published in PLOS ONE found that spotty brood alone is not reliable evidence of queen failure, because colony environment shapes the pattern significantly; rule out mites and disease first
- Drone-laying pattern: drone-sized capped brood scattered in worker cells, or multiple eggs per cell, which may mean the queen is out of sperm or workers have started laying (see the queenless hive diagnostic to sort out which situation you have)
- Defensiveness that has escalated gradually over weeks without an external trigger - our guide to requeening an aggressive hive addresses that specific situation
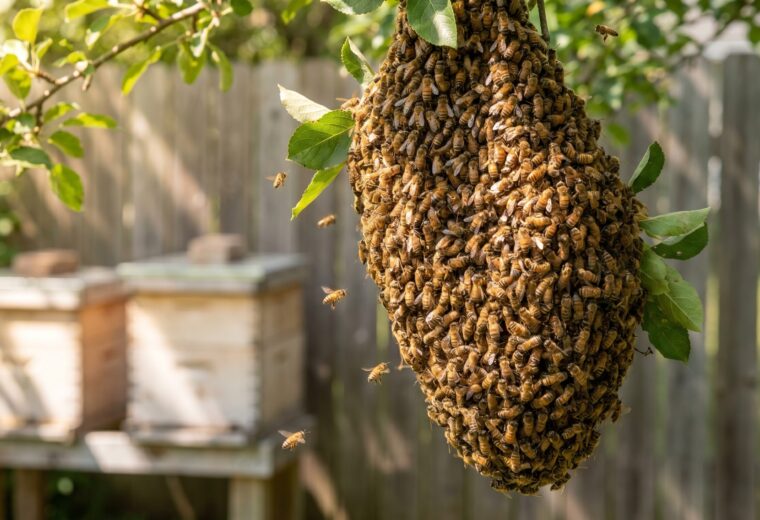
- Supersedure cells midframe, which means the bees have already started their own replacement process
Before buying a queen, confirm the hive is genuinely problematic. A single inspection that turns up no eggs is not enough. An egg is visible in a cell for about three days after being laid, standing upright at first, so if you find small larvae but no eggs, the queen was active within the last week. Give the hive a second look a few days later before concluding she is gone.
The decision table: when to act and how fast
This table consolidates the main scenarios, the evidence to look for, and the urgency level. Use it alongside your inspection notes rather than as a standalone diagnostic.
| Situation | Key evidence | Urgency | Notes |
|---|---|---|---|
| Routine annual requeen | Queen is over 12-18 months old; colony otherwise healthy | Planned - choose your window | Late summer or spring both work; no crisis |
| Population declining, unknown cause | Dwindling bees, sparse brood, mites and disease ruled out | Moderate - verify mites first | Treat varroa before assuming queen failure |
| Persistent spotty brood | Less than roughly 80% of brood area filled after two or three inspections | Moderate | Not proof of a bad queen by itself (PLOS ONE, 2019); confirm mites and disease are not the cause |
| Supersedure cells present | One to three cells on the face of brood frames | Low-moderate - colony acting already | You can let them finish or introduce a purchased queen |
| Drone-layer or laying workers | Domed cappings in worker cells; multiple eggs per cell or eggs on cell walls | High - act within days | Requires different correction than a simply failing queen; see the queenless article |
| Escalating aggression | Bees following and stinging beyond the hive footprint, developing over weeks | High - address before next inspection | New queen changes temperament over 4-8 weeks as her brood emerges |
| Queen confirmed dead | No eggs or young larvae found on two inspections 3-4 days apart; no queen cells | High - order a queen the same day | Laying workers typically appear only after 3-4 weeks of queenlessness, once the colony is also broodless |
Choosing and ordering your replacement queen
A mated queen from a reputable breeder is the right choice for almost all backyard requeening situations. She arrives ready to lay within a day or two of release. Raising your own from a queenright colony takes three weeks minimum and introduces failure points that make it a poor first option unless you are specifically developing that skill. The full buying process - races, traits, ordering calendar, marking - is covered in our mated queen buying guide.
On price and timing: mated queens from US breeders currently run roughly $35 to $65 depending on genetics and source; marked queens cost a few dollars more and save real time during future inspections. Orders fill fast in early spring, so if you plan a summer or fall requeen, arrange your source in advance. A mailed queen can survive for over a week in her cage with proper care - apply a small drop of water to the screen twice daily and keep the cage out of direct sunlight at room temperature until installation. Plan your introduction around her arrival, but you have more margin than many beekeepers assume.
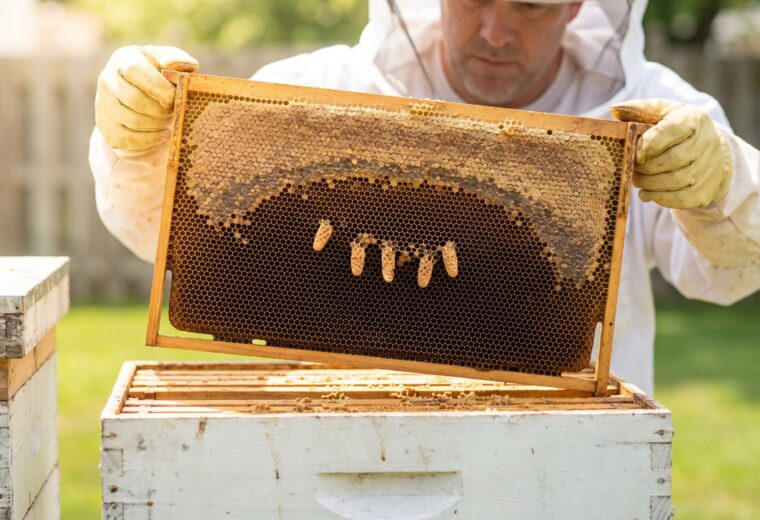
Finding and removing the old queen
A new queen introduced into a colony that still holds the old one will be killed. The workers have no reason to accept a stranger when they already have a functioning queen. Finding and removing the resident queen is therefore not optional - it is the step that determines whether everything else works.
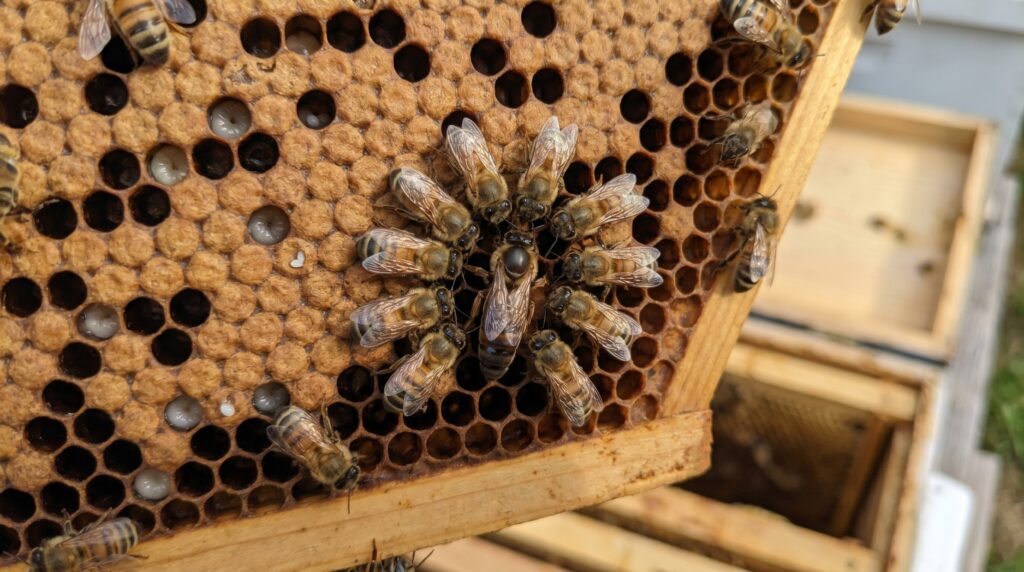
Work through the brood nest systematically, starting at one side of the box. The queen is almost always on a frame with open brood or eggs. She has a noticeably longer, tapered abdomen compared to workers; after mating her abdomen distends and her wings look short relative to her body. Bees in her immediate vicinity tend to orient toward her - the retinue response. Hold each frame at a slight angle to the light and spend five to ten seconds per side before moving to the next. Smoke lightly; heavy smoking scatters the bees and makes searching harder.
A marked queen is a significant advantage here. The international color code: white for years ending in 1 or 6, yellow for 2 or 7, red for 3 or 8, green for 4 or 9, blue for 5 or 0. Penn State Extension specifically recommends a broad-tipped Posca paint pen for marking, which is non-toxic to bees. If your queen is unmarked and you cannot locate her after two thorough passes through the brood box, close the hive and return in four or five days. Eggs present means she is there and you missed her. No eggs and no young larvae means the colony may already be queenless and you can move directly to introduction.
Once you have her, pick her up gently between thumb and forefinger. Some beekeepers cage her alive as a backup for the first two days in case the introduction fails, which is a reasonable precaution. Others dispatch her immediately. Either way, the hive needs to be queen-free for at least a few hours before the new queen arrives.
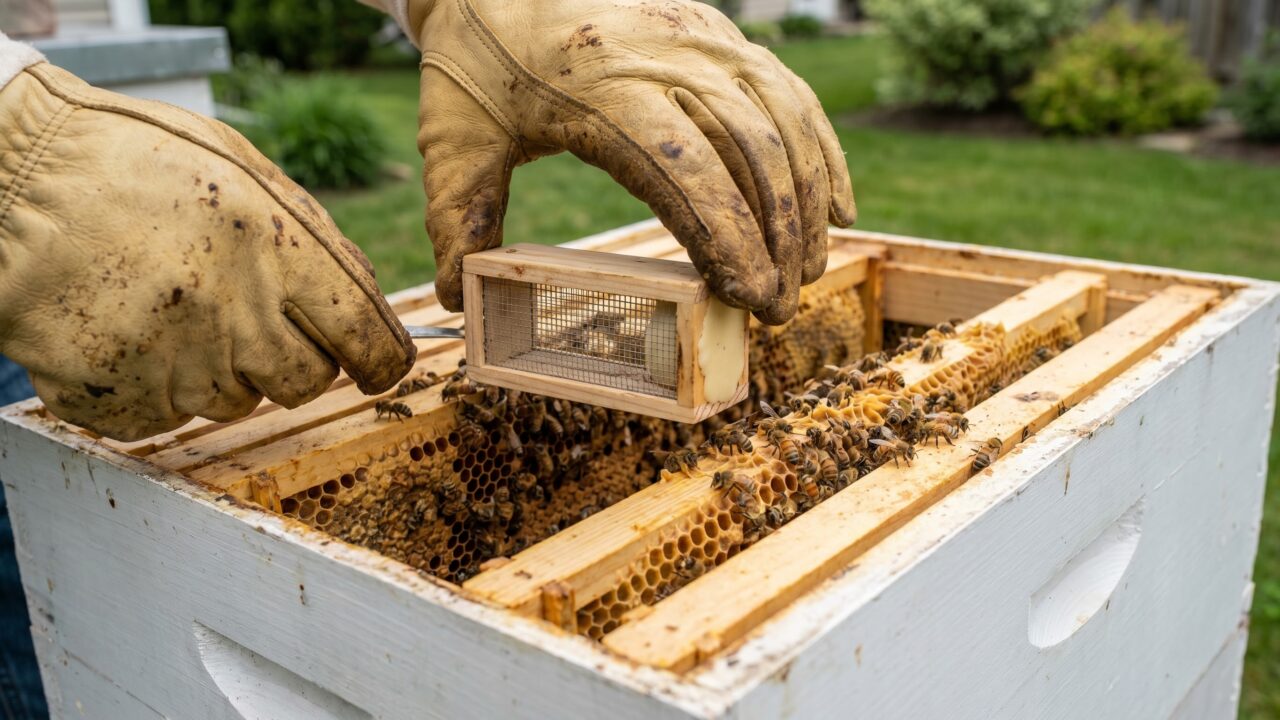
Introducing the new queen: the candy-cage method step by step
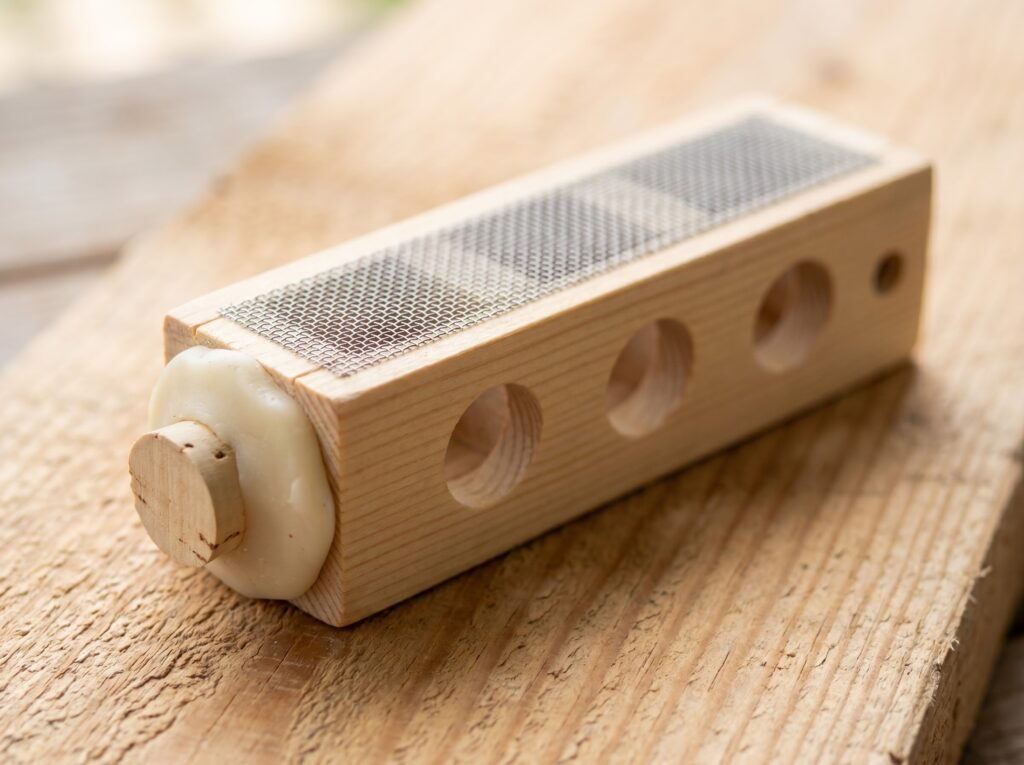
The mailing cage your purchased queen arrives in is also the introduction tool. One end holds a plug of firm sugar candy. Workers on the hive's side chew through from the outside while the queen and her attendants may work from inside; the process takes two to four days under typical summer conditions. By the time the candy is gone, the colony has had enough pheromone contact through the cage screen that most healthy colonies accept her without incident.
Here is the introduction sequence, in order:
- Wait at least 24 hours queenless before introducing. Extension.org Bee Health is clear that a full day lets the old queen's pheromones fade enough to prime the colony for acceptance. Introduce within an hour of removing the old queen and you raise rejection risk substantially.
- Remove the attendant bees from the cage before you go to the hive. Research cited by Extension.org found that attendants from the breeder's colony interfere with acceptance, likely because their foreign odor creates conflicting chemical signals. Do this in a closed room with a window so the queen moves toward the light and is easy to catch if she escapes. Gently shake or brush the attendants out, then re-close the cage.
- Insert a small cork or toothpick into the candy end. This blocks the candy tube so the colony cannot chew through too quickly. A strong colony in mid-summer heat can consume the plug in hours rather than days, releasing the queen before the colony has adjusted to her presence. You will remove the cork at day three.
- Suspend or wedge the cage between two frames in the brood area, screen side facing out. The candy end can face either direction, but many beekeepers point it slightly downward so any melting candy does not drip onto the queen. Young nurse bees on brood frames are the most accepting workers in the colony; foragers are the least. Center the cage in the brood nest, not near the walls.
- Close the hive and leave it alone for 48 to 72 hours. Every inspection during this window disrupts the pheromone integration process. If you cannot resist checking, do it through the bottom entrance without opening the lid: a calm colony is a good sign; loud buzzing and alarm pheromone smell (like bananas) is a warning sign.
- At day three, remove the cork and allow the candy to release her gradually over the next several hours. If you prefer to release her yourself, gently press a small opening in the candy plug and let her walk out onto the comb. Do not release her directly onto the top bars or outer frames; place the open end of the cage near the face of a brood frame so she steps directly into the colony's center.
A note on timing relative to the nectar flow: Extension.org observes that acceptance rates are highest when forage is coming in. Bees in a flow are calmer, less defensive, and more tolerant of a stranger's pheromones. If you are requeening during a dearth, be especially careful to avoid disturbing the hive during the introduction window, and consider feeding 1:1 sugar syrup to simulate a light flow.
Checking acceptance: what to look for and when
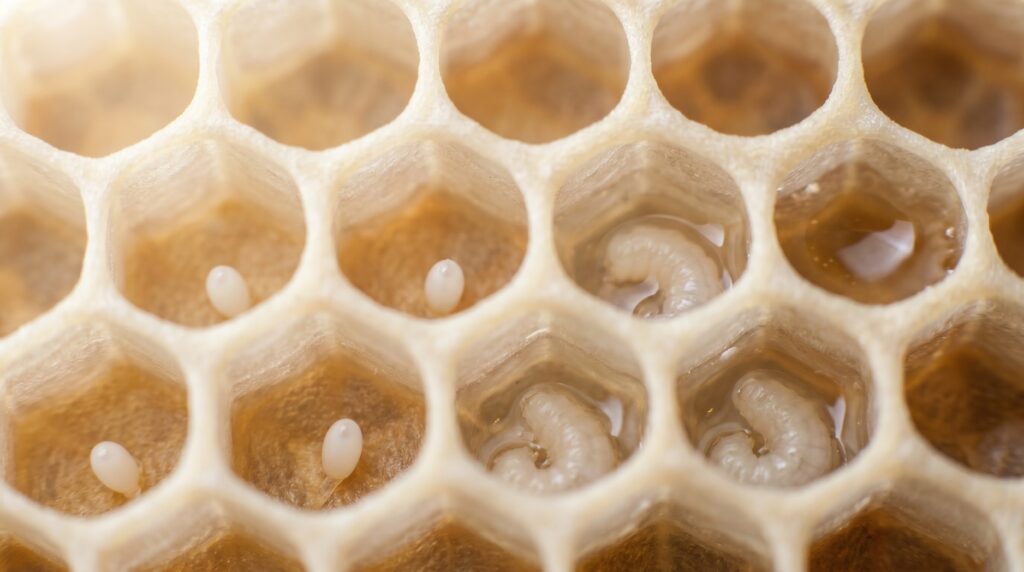
Seven to ten days after the queen was released, open the hive and look for eggs. An egg is visible in a cell for about three days after being laid, standing upright at first, so finding eggs means she was active within the last three days. That is your confirmation. Seeing the queen herself is reassuring but not necessary; a well-settled queen can be hard to find even after a successful introduction.
Three outcomes to be ready for at the day-seven-to-ten check:
- Eggs in a reasonable pattern across the center frames. Success. Close the hive and leave it for at least another week. The new queen's first full brood cycle takes 21 days from egg to emerging worker bee, so do not expect to see the population change for several weeks.
- Empty cage, no eggs, queen visible and moving freely on comb. She was released but may not have begun laying. Give the hive four to five more days before checking again. New queens sometimes take a full week after release to settle into a laying rhythm on a new comb.
- Empty cage, no queen visible, no eggs, and possibly one or more fresh queen cells started. The introduced queen was almost certainly rejected and killed. The bees have started raising their own. This is the failure scenario. Before ordering another queen, identify why: the old queen was still present, a queen cell in the hive was missed, the colony had active laying workers, or the hive was opened during the introduction window. Fix the underlying condition before the second attempt.
At day 21 or later, check the brood pattern quality. A healthy new queen should show compact capped brood covering most of the cell area in the brood nest - UF/IFAS sets a practical threshold of no more than about 20% empty cells within the brood area as a benchmark for a normal pattern. More scattered than that, and the queen may not have mated well, or the colony environment (mites, disease, comb condition) is interfering. Treat mites before drawing conclusions about the queen.
When the introduction fails and what to do next
A failed first introduction is frustrating but not unusual. The main causes, in rough order of frequency:
- The old queen was still in the hive. Always the first thing to check.
- An overlooked queen cell gave the colony an alternative they preferred to the introduced queen.
- The candy released the new queen within hours rather than days, before pheromone acclimation could occur.
- The colony had been queenless long enough to develop laying workers, who actively reject any introduced queen.
- The hive was opened during the critical first three days.
A second introduction attempt has lower odds than the first, because the colony is already on alert. Before trying again: confirm the old queen and any queen cells are truly gone, add a frame of open brood from another healthy hive to suppress laying-worker behavior and stabilize the colony's pheromone environment, and wait three to four more days before the new queen arrives. Extension.org's finding that smaller colonies accept queens more readily than large ones is useful here: moving the queenless colony into a smaller nucleus box, with fewer frames and a tighter cluster, can improve odds for the second attempt.
The laying-worker scenario is a separate problem covered in detail in the laying worker signs article. The short version: a colony with active laying workers will ball a caged queen as surely as a queenright colony will. You need to suppress the laying workers first, either by combining with a queenright colony over a sheet of newspaper or by repeatedly adding open brood frames to re-establish queen and brood pheromones before attempting another introduction.
One more honest point on expectations: even a completely successful requeen means five to seven weeks before the new queen's offspring are a majority of the colony's population. The old queen's workers age out during that period, and the colony may look weaker before it looks stronger. Plan the timing so that transition window does not land in the middle of your main honey flow. The natural queen replacement process is explained in detail in the swarming and queens overview, including how supersedure and swarm-cell replacement differ from what you are doing here.
Questions answered
How long after removing the old queen should I wait before introducing the new one?
Extension.org Bee Health recommends at least 24 hours. That window lets the old queen's pheromone signature fade enough to prime the colony for a replacement. Introducing within an hour of removal is possible if you are also giving the colony a mailing cage (not direct release), but the 24-hour wait consistently improves acceptance odds. Laying workers typically do not appear until the colony has been queenless and broodless for 3-4 weeks, so there is no need to rush so quickly that you skip proper preparation - though you should not delay introduction beyond what is needed to do it correctly.
Can I requeen with honey supers on the hive?
Yes. The cage goes into the brood box below the queen excluder; the supers above it stay in place. Remove them from the hive temporarily if you need clear access to the brood nest during the introduction, then stack them back on. The introduction process itself is confined to the brood box, so supers do not need to come off for more than a few minutes.
What does a rejected queen look like?
Usually you find the cage empty and no sign of the queen anywhere on the frames. Sometimes there is a small tight ball of dead workers in a hive corner - that is the balled queen, encased in the workers that killed her. If you find the cage empty and no eggs appear over the next five to seven days, rejection is the most likely conclusion. Order a replacement and identify what went wrong before the second attempt.
How soon will I notice a temperament improvement after requeening an aggressive colony?
The new queen's genetics do not propagate immediately. The workers in the hive are the old queen's daughters and will remain defensive until they age out, which takes four to eight weeks. Temperament improvement follows the brood cycle, not the date of introduction. See the aggressive hive requeening guide for what protective measures to use during that transition period.
- Penn State Extension"An Introduction to Queen Honey Bee Development" - used for queen egg-laying rate (over 2,000 per day at peak), productivity decline after year one or two, and physical identification of mated vs. virgin queens. https://extension.psu.edu/an-introduction-to-queen-honey-bee-development
- UF/IFAS Extension"The Basics of Queen Management in Beekeeping Operations" (IN1457) - used for annual requeening recommendation, seasonal timing guidance, and the 20% empty-cell threshold for poor brood pattern. https://ask.ifas.ufl.edu/publication/IN1457
- UF/IFAS Extension"Requeening a Beehive" - used for September timing, mailing-cage introduction procedure, and placement between brood frames. https://sfyl.ifas.ufl.edu/agriculture/requeening-a-beehive/
- Extension.org Bee Health"Queen Marking and Requeening" and "What is the best way to introduce a queen into a colony?" - used for 24-hour queenless waiting period, 3-day cage timing with cork-plug method, attendant removal guidance, and nectar-flow timing effect. https://bee-health.extension.org/queen-marking-and-requeening/
- PLOS ONE / PMC"Is the Brood Pattern within a Honey Bee Colony a Reliable Indicator of Queen Quality?" - used for the finding that brood pattern alone is an insufficient indicator of queen quality and that colony environment significantly shapes pattern. https://pmc.ncbi.nlm.nih.gov/articles/PMC6359415/